Sunday, April 29, 2012

Life Goes On


Well so much for good intentions. I’ve been working on my projects but not as fast as I’d hoped and definitely not posting updates like I had planned. This week was looking good for catching up. I even was almost done with the TAST2012 stitch for this week by Wednesday. Ha! I was going to finish block 2 and 3 for the CQJ2012 project in time to be included on their website with my own page. That didn’t happen either.

Instead I spent a lot of time at the local hospital waiting for the doctor’s to determine exactly what needed to be done for my husband. He had taken a mean fall at home on Wednesday and was in a lot of pain. Thankfully the injuries from his fall were not that serious (he does have to use a back brace and do no work for the next two months). That will be a challenge since he is working outside in our yard all day long.

The doctor’s did decide he needed to have a pacemaker installed. His heart rate was staying in the 30 range and the highest they could get it was 40. So Thursday they did the procedure and Friday afternoon he was released. I was at the hospital almost the whole time so I did not get much rest. I did manage to finish the TAST2012 stitch and add a whole lot of French Knots to the Monkey Face piece.
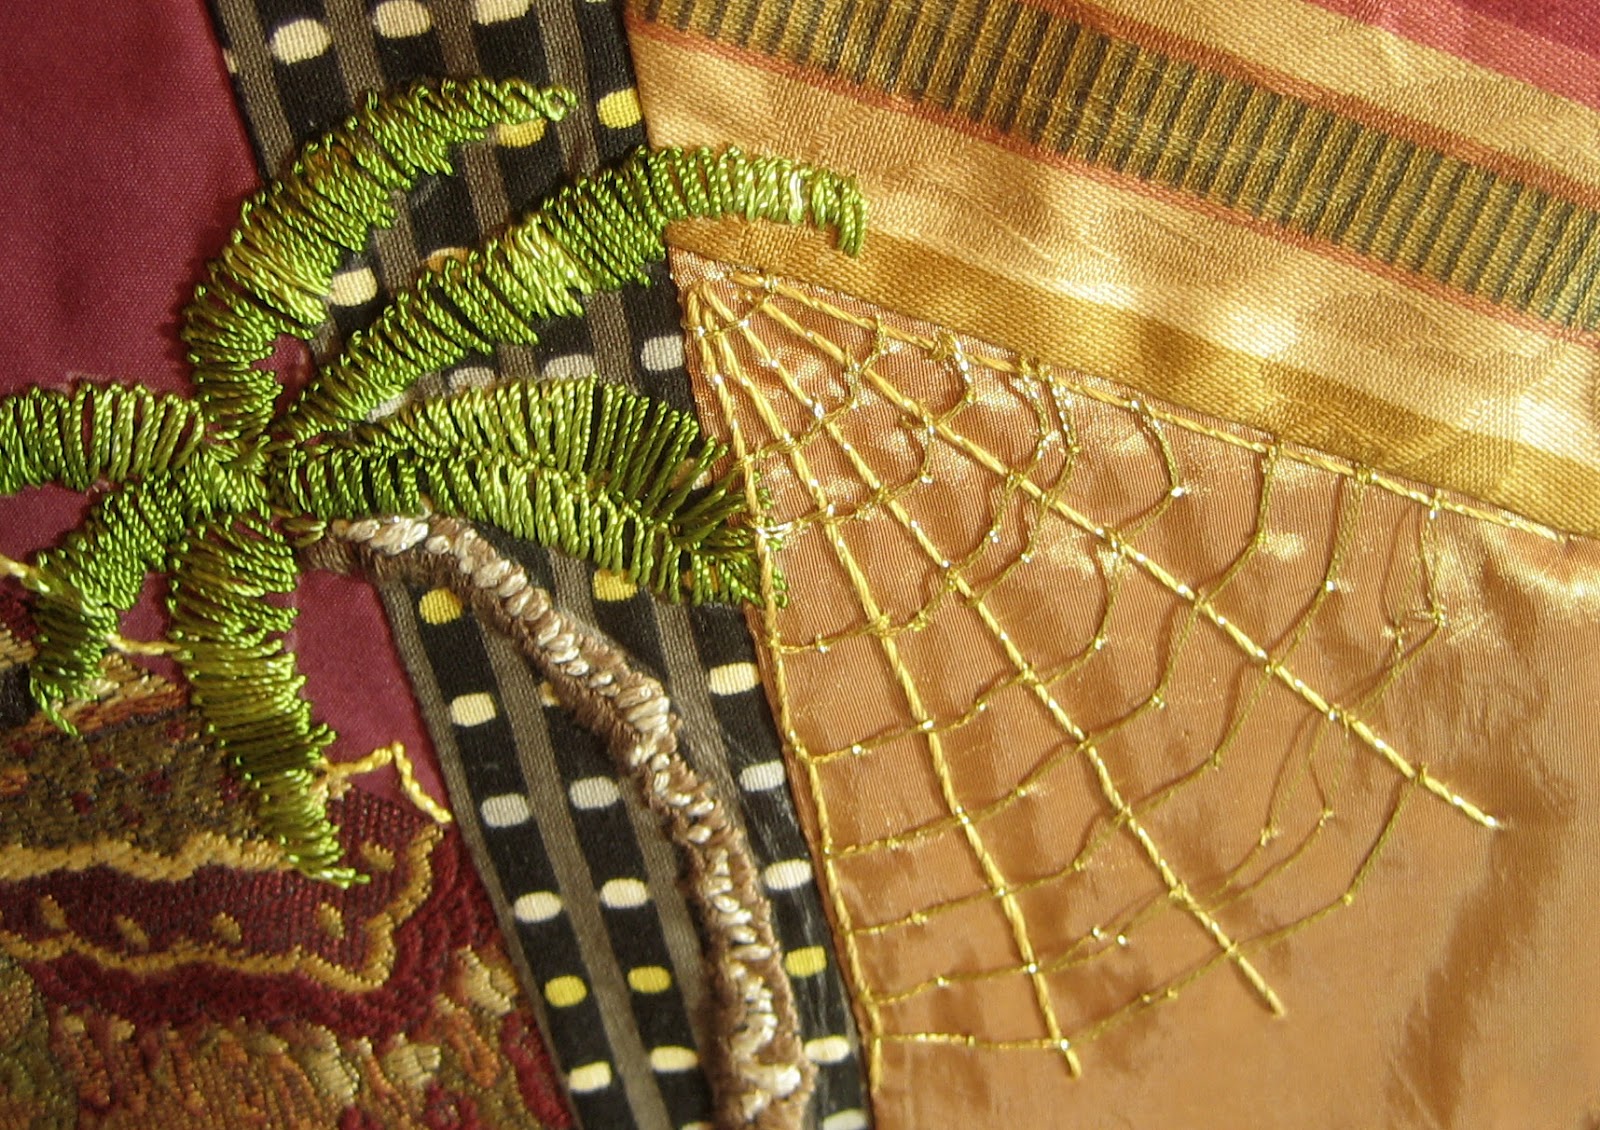
TAST2012
Wheatear Stitch Scribble

Wheatear Stitch following another one of my scribbles. I decided to use a wheat color thread to work this design. First I practiced the stitch on my sampler since this was the first time I had used this stitch. I wanted to see how well it handled the curves of my scribble especially the tight ones. I’m quite pleased with the results.


Last week the stitch assigned was the French Knot. I love this stitch and have been using it since I was a teenager. I had never seen it worked in a tight style until I saw the work my mother-in-law did. Eunice Balaz was a master of the French Knot and bullion stitch. Here is a sample of her work with close quarter French Knots.


I have a better example which she did on a dress for my daughter. As soon as I can get a picture of it I’ll add it to my blog. Also a picture of her bullion work.  My mother Mabel Ruth taught me how to embroider when I was just a child of six of seven. Eunice taught me how to do the bullion rose. She used DMC floss and a milliner’s needle. The needle was new to me. Her floss was the variegated variety which she bought by the case. It’s not as easy to come by these days. When she used it she would cut off the very pale sections and use only the stronger color. I’m still amazed when I see her work.


For my sample I decided to stick with my scribbles. When I scribbled this one I immediately saw a face so I decided to outline it with French Knots and then fill it in with more French Knots.  I decided it was a Monkey Face and I will add ears to the design. This is a departure from my usual scribble which I normally do not add any more lines once the scribble is done. Rules need exceptions and this is one of them.

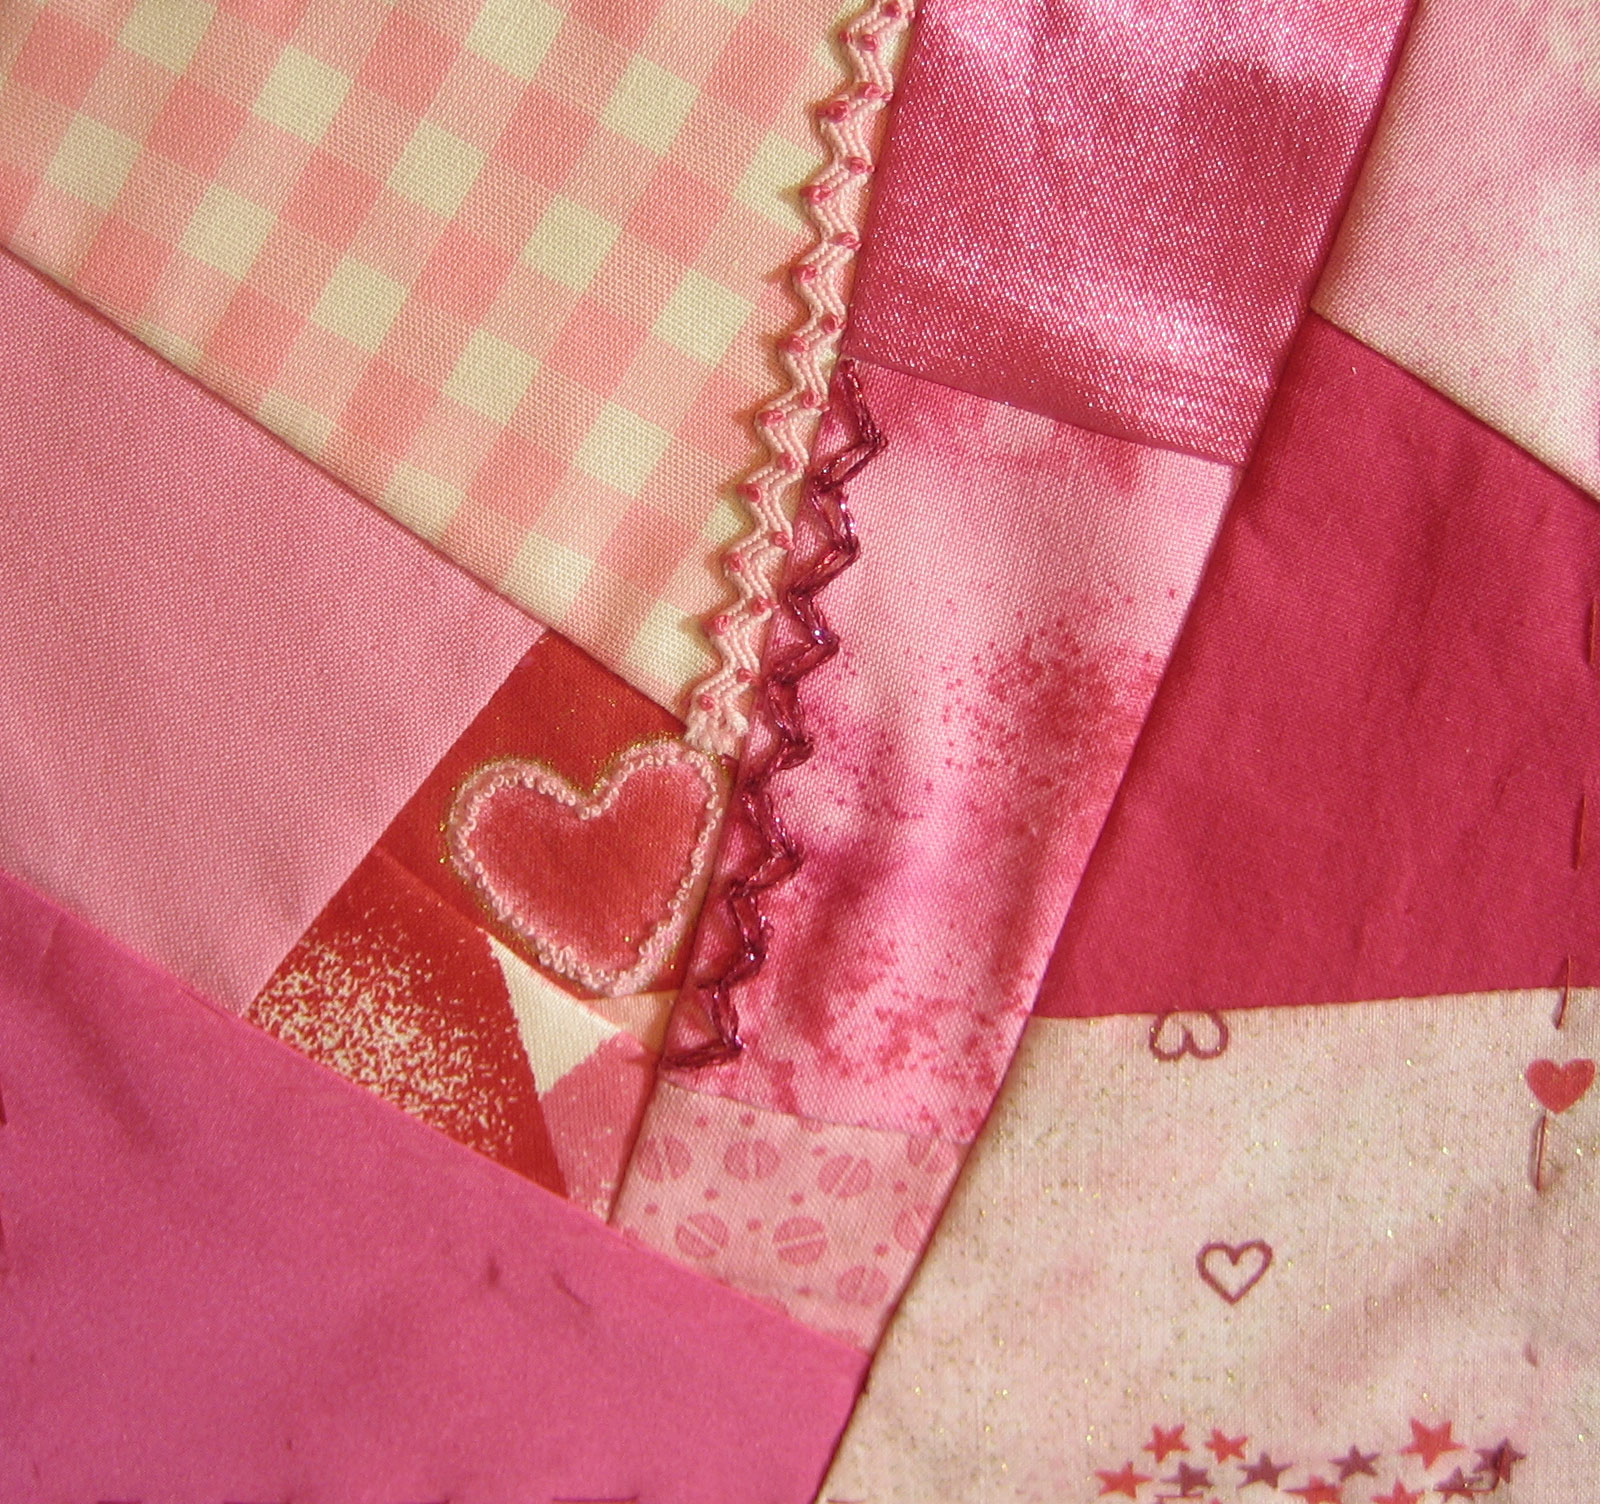
Here is the outline:
French Knot Monkey Face

Filling the Monkey Face


And here it is in process of being filled in. These knots are all single loops done with DMC pearl cotton size 8.


CQJ2012 


February Crazy Quilt Block

My February block is finished except for some buttons and possibly beads to be added as I assemble the entire crazy quilt. March is in the works. April fabrics have been selected and should be stitched this week.


Robin's nest in my magnolia tree
  1. Air scented with flower perfumes
  2. Blue robin eggs
  3. Plants poking through the ground
  4. Modern technology

Happy Stitching!
Rose

Sunday, April 15, 2012

Another Week Gone!


TAST2012:
Stem stitch or Outline?

This week for TAST2012 we were assigned the stem stitch. Oh good I thought! Ha! I made my scribble and looked at Sharon’s stitch dictionary and followed her suggestion for left hand stitching. Take the photo of the stitch into a photo editing program and flip it horizontally. Okay that worked but when I started to stitch I think I kept the thread at the top of my needle rather than the bottom. So I think what resulted was the outline stitch. They are very similar and really the only difference is the placement of the thread in relation to the needle. So now I plan to make the scribble on the computer, print it out on fabric three times and then do one with the stem stitch, one with the outline stitch, and one more with the backstitch. I’ll label each one so I know which is which. Normally when I am outlining a pattern I use a combination of the three stitches. Hopefully this will help me when I need to know which stitch I am using.

CQ2012:
February Block with progress

I did make some progress on my February block. I only have a few more seams to embellish and then add some embroidery. Buttons and beads will be added when I assemble the whole quilt. But I do have a cute cupid button (gold) and some heart buttons planned to cover up the raw edges of my trims. Will I ever learn to add some trims when I am sewing the block together? Maybe on the next one but I’m not sure I have any for April, I do have the fabrics selected for the April block. I should get it stitched and ready for the embroidery work this week. (I have to get my taxes finished first!)


Flower Basket Block for Quilt Guild

Other Projects:
I did manage to get a block made for the quilt guild I belong to. Our meeting was Tuesday and yes I waited until Monday night to get it started. What a mess. First the fabric I wanted to use for the floral part of the basket block shrunk when I pressed the seams with my iron. I had already made all of the squares when I discovered this so I had to start over again. This time I shrunk the fabric before cutting. Next my blade in my one cutter needed changing but I didn’t have a new one handy. I managed to cut my pieces but had to constantly go back where the blade had skipped one or two threads. After that I started sewing and my machine started acting up. I rethreaded and checked the bobbin case that improved it somewhat but it still wasn’t working as it should. I almost didn’t turn my block in but they accepted it. (I did offer to take it back and try and make a better one but they said no need.)

Only other thing I managed was to try and learn to feed my grandson solid foods. As you can tell by his bib it was a little messy but we managed to get the hang of it. He sits in a big chair for his feeding and I think it makes him feel important! Can’t believe he’s six months already and eating food and cutting teeth!
"I'm gonna chew on my toes if you don't get some more food in my mouth!"

  • Sound of coffee perking
  • Hum of my sewing machine
  • Son's new smile 
  • Daughter snuggling with Jaden 


Happy Stitching,
Rose 

Monday, April 9, 2012

Tip for the Embroiderers Out There

Okay it's Monday and I'm back to share a tip for those who use the hoops for embroidery that are adjusted by a screw.
I always seem to get my thread caught on the screw every now and again and it gets me frustrated. It really isn't good for the thread and I lose my rhythm of stitching as well. So what to do?
I did see where one of the manufacturers of hoops has come out with one that tries to take care of this problem but it was expensive and not available in the type and size of hoop I like to use. My preference is an oval shape about 6 inches long. My hand can hold it better.
Okay back to the problem at hand and I hope I'm not the only one having this happen either a lot or occasionally.
Here's what I did and I can't be more pleased with the results: I went to the hardware store and purchased a roll of plastic tubing. To be exact it was 3/8" X 1/4" X 20 ft. long. Okay sure I don't need 20 feet but that was the smallest I could find. I think places like ACE (at least the one in Hawaii) may have rolls where they will cut off a piece for you.
plastic cover for screw
I cut a piece off that was a little more than the length of the hoop screw. Then I slit along one edge of it to open it up. Now I just slip it over the screw once I have the tension adjusted and I can embroider with out any snagging frustrations!
I think I would like a piece just a little bit bigger so the tube touches the side of the hoop. The 3/8" has a very small gap that your thread could slip under but at least it's not catching on the screw and shredding.
close up of cover

An inexpensive fix for a very frustrating problem! And it can be used on more than one hoop no matter the size of the hoop!

Happy Stitching!

Rose

Saturday, April 7, 2012


See I Can Do This!

Back again with an update to TAST 2012:
This week’s assignment was the satin stitch. This is a stitch I’ve used a lot and so it came fairly easy. First I did my scribble (for a while I was calling this doodling but realized it’s really a scribble that I sometimes doodle in with thread and color). I tried to keep it simple as I really wanted something I could finish quickly. When I stopped and looked at it there seemed to be a bird of sorts looking back at me. So I decided to go with that idea.
But Is It a Bird? Satin stitch sampler

The satin stitching was done in rows using my favorite color yellow in variegated pearl cotton. Then I did the beak as it appeared again with a satin stitch and some orange pearl cotton. The eye was done with French knots using black DMC thread and white pearl cotton. Using some variegated blue pearl cotton a encapsulated the bird with a chain stitch. I love how it came out but I’m not sure it’s a bird (at least any known bird) so I named the piece “But Is It a Bird?”.  I’m still considering filling in the rest of the body.

Other happenings:

I’ve been trying to make a driver’s cap for my grandson Jaden with my own modified pattern. Commercial patterns are sized for a one year old or larger and he’s only 6 months. The hats are either too big or too small. Finally I made one to fit his head but the sides of the hat are too short so back to the drawing board!
Jaden 
I did get a cushion covered for him that gives just enough support under his jumper so he can rest his feet and jump. He won’t be needing it for long though!

Now for a praise report!
My son had surgery to place implants in both the top and bottom gums. They found more bone than expected and so were able to do all of it at once. Praise God! After not having any teeth for so long he looks great! You can read more about it at Mo’ Bettah Smile.

I have just finished reading “One Thousand Gifts” by Ann Voskamp. What an amazing book! I’ve started my own list and hope to incorporate some of them in my embroidery and collage work. My daughter gifted me with the book as a thank you (one of many I’ve received from her) for watching her son Jaden (my grandson is welcome in my home and heart any time!).

  1. Sunshine and Rain
  2. Flowers that bloom
  3. Baby snuggled sweet in my arms
  4. Giggles

That’s all for now! Be back Monday with a tip that I think embroiderers will like. At least those who work with a hoop that has a tightening screw.

Happy Easter and Happy Stitching,

Rose 

Friday, April 6, 2012

Now For Some Crazy Quilt Updates!

Elephant Block

The elephant block

The elephant block is coming along. Seems like it is taking a long time but there are long spells in between where I don’t pick it up at all. When I do the stitching goes quickly.
Paisley with ribbed wheel

I’ve added some paisley (sort of) designs to the block. One has a woven wheel (some places call these webs) and the other has a ribbed wheel.
Paisley with woven wheel
Other than that they were both done the same way. First there is a chain stitch followed by an overlapping fly stitch, another row of chain stitch and finally the French Knots.

Next I added some straight stitch tassels to the border treatment. I like how they look like they are moving.

Tassels added

Finally I got around to adding a couched spider web in the corner of one section. I plan to add a spider but haven’t decided on the technique.

Couched spider web
I still have some trim to add to the block as well as some mirrors and maybe some more stitching before I’ll be ready to add the buttons and beads and then ready it as a wall hanging.

CQ2012

The January block is finished except for finishing touches of buttons and beads. I won’t add those until I assemble the blocks into one piece. I really like the snow angel and ice skates I embroidered. Winter always reminds me of those two activities. The ice skates were done by tracing them onto some tissue paper and then using sewing machine thread with a back stitch to mark them on the block. This is the first time I’ve used this technique and I’m sure I’ll use it more frequently. The thread I used was a little thick for this so I’ve tracked down some 40wt thread locally and will try that next. There are some snowflakes and an attempt at icicles along with other stitching.
January
 February block is being worked on with French Knots around the center heart, laces, and trims. I think I’m going to stick with the pink colors and off white or cream. I may add a touch of gold as I have a gold cupid button I plan to add when it is finished.
February
March has been pieced and a lion and a lamb have been outlined using the tissue paper method this time trying a single strand of embroidery floss. They will be filled out with French knots and other stitches. The reason for the lion and the lamb is because of the saying that March comes in like a lion (I know it should be a roaring lion but I couldn’t find one I liked plus I didn’t want to scare my grandson!) and goes out like a lamb.
March
 April is being planned with some gray fabrics, rainbows, rain, umbrellas, etc. Well you get the picture April showers bring May flowers. I think you can guess what May’s block will look like!

Name Badge
I finished my name block (well finished enough that I could use it). I still plan to add some yoyo’s and buttons around the outside edge and on the neck strap. I may need to make another one where my name is larger. We’ll see.


Next up will be a post showing my satin stitch sampler for TAST2012 and a praise report. Stay tuned and in the meantime:

Happy stitching!

Rose

Tuesday, April 3, 2012

Where Does the Time Go

It doesn’t seem possible it’s been over a month since I last posted. And my goal was to post at least once a week! I’m going to have to plan better.

Now for a month of updates: 

Detached Chain
TAST2012. While I’ve done most of the stitches I need to finish a few more. The detached chain stitch is one I use a lot especially for daisy flowers. I wanted to see how it would look with one of my meandering lines (doodles). I drew a double line to start (first I drew a curvy line and then added a second line following the first.) The first sample I started was a bit large to complete in a week so that one is now in the UFO (unfinished object) stash. The second one worked out great. I used a variegated pink pearl cotton thread. I stitched a detached chain along the lines with all of them facing in the same direction and then went back and filled in with detached chains facing the opposite direction. This uses more thread because you are going over the same cloth twice. I tried doing them all at once – one facing one way, one facing the opposite way but it worked easier and looked better doing them in two passes.
Close up of French Knos
In one section I anchored them with a French knot rather than a straight stitch. I like the texture this gives the piece. I couldn’t help thinking caterpillar though as I did them!


Some of the stitches I have used in other projects. The running stitch, couched stitch, and wheel stitches I have used in the January Crazy Quilt block for the CQ2012 Challenge. They were also used in my Crazy Quilt elephant block. Pictures of those coming up later this week.
I have done a sampler of the other stitches (thank you Sharon for the catch-up week!), here they are:

Running Stitch

Chain Stitch
Woven and Whipped Wheel Stitch
This one I love doing. This piece is called sun spots and I used a yellow variegated pearl cotton for all of them. Some have an odd number of legs some have an even number of stitches. The top one was done over a bead and button blank so it is very dimensional. The one to the left of it was started as a ribbed web and then I just wrapped each leg separately for a distance and then I went back to the ribbed web. When I was finished I decided the blank pieces needed something so I added a French knot in each one but I couldn’t stop there so I completely filled the white sections with French knots! I then added a French knot at the end of each leg. The one just below it was started following the tutorial on Annet's blog. But I decided  not to do the entire piece so I left the outside ring blank and added French knots at the end of each spoke. Can you tell I like French knots?  The next one to the right was done half and half. I did the ribbed one and then added the other legs and did a plain woven one. The tiny one is a woven one to the left of it is a ribbed one and the last one was ribbed, woven, and then the legs were wrapped individually and French knots added to the ends. I really enjoyed doing this one and plan to do more.

Barred Chain Stitch
 I had a hard time getting the rhythm of this stitch but finally succeeded.

Alternate Barred Chain Stitch
This stitch was even harder for me to get a rhythm going but perseverance pays off!

Happy stitching!

Rose