Showing posts with label TAST 2012. Show all posts

Wednesday, March 12, 2014

Hello there! WWW

Thank you everyone for your prayers and thoughts! My surgery went well. The tumor was a very small one and only Stage 1A cancer so no more treatment is needed, just watching me closely for a while. I’m feeling great just have to be sure I don’t overdo it with lifting etc.
I have been slowly getting back into stitching so this is what I have in progress this Wednesday.
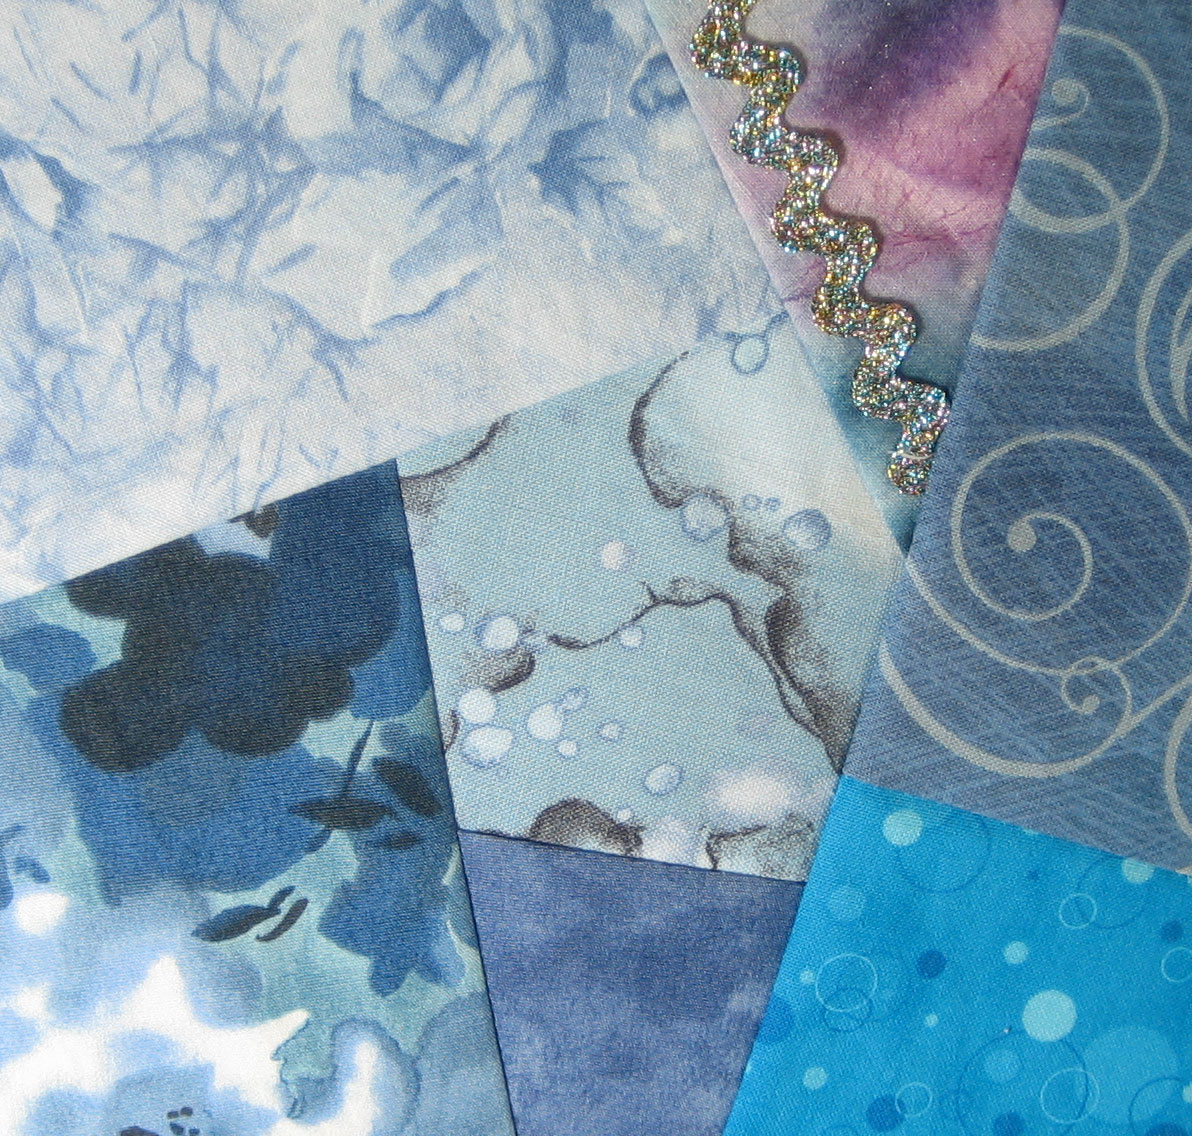
I finished a block for my quilt guild’s monthly block exchange, I’m only two blocks behind now!
Scrappy Blues Block

My first fifteen minute project is now complete. It was surprisingly easy to keep it going. The day of surgery and two days of recovery did not see any stitching but I made it up later in the week by stitching extra fifteen minute periods. Thirty eight days later the monkey is now done but I think he will just go in the box with all the rest of my TAST2012 pieces. I haven’t decided what to do with them yet. (Please don’t ask how many French Knots are in that piece!) I did add ears which were not in the original scribble. Generally I do not add any lines or scribbles to one once the pencil leaves the paper or fabric but he just needed some ears so they were scribbled in.
French knot monkey 15 minutes a day priject
I’ve gotten back to working on my summer hexagon project that I started last year using embroidery designs from Wild Olive. I modified a few of them. This is my first time making hexagons and I struggled with sewing them together. I worked at it during a few of the Friendship Stitchers group I belong to. Then I decided I really want to get it finished (I have the designs for Fall, Winter, and now Spring waiting in the sidelines). So I started doing it as one of my just fifteen minutes a day projects but I got carried away with it and worked more than fifteen minutes. So it is getting done a little faster than expected.

Summer Hexagon Embroidery Pioject
Painted hoops
Next I painted some outer embroidery hoop frames in anticipation of another Finish It Friday project. I’m hoping this Friday to have some results to show.


Happy Stitching! 

Rose

Wednesday, February 5, 2014

WWW - The 15 Minute Project

So I posted last Friday a picture of my scribble French Knot monkey that has been sitting in a pile of unfinished projects. I knew I had too much to do to be able to finish it in a Friday. So I decided to just work on it 15 minutes a day, you know, slow and steady. Here it is as of today.

Monkey Face 
Can you see the progress? I’m not the fastest stitcher for sure but I am actually enjoying my fifteen minutes a day with it. I read somewhere recently that our attention holds onto something for about 28 minutes. So we should set a 28 minute time limit for each project and at the end of 28 minutes go on to something else. Well I’m not sure that is really true as I know I can get started stitching and lose all track of time. Now when it comes to cleaning or organizing well yeah
about 28 minutes as all I can handle!

I’ve decided to take the 15 minute approach to some of my other projects that I have sitting around waiting for some attention. This is a piece I started back in 2012 while taking an online class from Sharon Boggon.
Bird Nest in a tree
It is a monochromatic encrusted nest in a tree. What you don’t see the encrusting? Right. It’s not there yet. I got stuck on the tree part. 
Here's a close up on the tree which I worked on today.
Tree stitching
I really would like to get it finished all though I’m not sure what I will do with it when I’m done stitching. I’ve added some more stitching (couching) to the main tree section and I’m happy with it. There is one stitch that sort of sticks out like a sore thumb but I think I know how I will fix that. Anxious to get started on the nest. You can read more background about this piece in this post. 

And I’m not sticking to my fifteen minutes on this piece. I may go over that time if I get really into what I am stitching on it. I think when I get to the encrusted nest part I will happily get lost in it.
Only time will tell.


Happy Stitching Wednesday!
Rose 

Saturday, February 1, 2014

FIF:Finish It Friday! Didn’t Happen!

Well this week Friday didn’t see any finishing. Not that I didn’t try! I had planned to finish the next three flash cards that I started a while back. So I finished embroidering the circles.
Circles finished

Love how the running stitch one turned out. I wasn’t sure when I started it but as I saw it progress I liked it more and more. I will have to experiment with doing the running stitch in multiple rows. I think it has potential!

Then I damp stretched the three. Friday I cut the inside stiffening material, and looked through my black and white fabrics for suitable candidates. If you look closely at the “T is for Triangle” one you will notice that I used a white fabric that had little tiny black triangles on it. Now I know I won’t be able to continue this theme if I decide to make more shape flash cards but I wanted to try for the next three. 

Fabrics to chose and inside stiffener cut
One is a very busy print but if you look closely (for a better look at any of my photos just click on them) it is made up of angles. Good! Next came the dots and I waffled between the tiny, tiny white dots on black fabric or the larger black dots on white fabric. I think I will use the tiny dots for the dot card. Next came the circles, the black fabric with the white circles in different sizes is good but the fabric is more of a silky where the others are cotton or cotton blends. I think I will look for a different fabric for the circle one and while I’m at the store (excuse to go shopping!) I will check for the other two also. Just in case there is something that will work better. I’m thinking if I do continue with more flash cards I may just have to design my own fabric and have it printed professionally!

Monkey from 2012
The other thing I did was decide to try and stitch French Knots for 15 minutes a day on my monkey face scribble I started back in 2012.He’s been staring at me for a while wondering when I was going to give him some attention. One day he too will be a Finish It Friday project.
Monkey today
Plus I had my grandson with me most of Friday and he’s my best reason for not getting more finished. Any time I get to spend with him is a joy filled day!

Well at least I didn't start any new projects on Friday!

Happy Finishing ( or almost finishing!)!


Rose 

Sunday, November 11, 2012

Finally Getting Started…

Workbook entry for Embroidery Ledger class

Several years ago something had happened (I don’t remember what) that made me begin to ask God to show me why I became so upset over criticism both good and bad. Didn’t seem to matter my blood would begin to boil. As I prayed, a day in my life came to mind, one which I had totally forgotten about, well at least conscientiously.

I was back in first grade. For some reason the school had decided to combine some first and second graders into one class. I think it was to be a combination class of some kind not two separate classes. I don’t think the teacher was too happy about it and was teaching us as two separate classes.

One day she told the first graders to color in their workbook while she worked with the second graders. I tried to get her attention but she told me to be quiet and start coloring. So I was obedient.

Well a little while later she came by my desk picked up my workbook and held it up to the class “Look what Rose did, she colored everything yellow.” Well of course the whole class, first and second graders laughed. I came from a rather large poor family. What they didn’t know was that was the only color I had that day and that is what I had been trying to tell the teacher when she hushed me.

I wanted to cry, I was so embarrassed. Since then I have been super sensitive to other’s reactions.

Once I realized what was the root of my feelings I was able to overcome my super sensitivity and accept and value the opinions of others.

I have been considering doing something with the color yellow ever since then. A body of work called “Look, she colored everything yellow!”. It will be at least a quilt, a collage, and an embroidery piece. I love the color yellow! So in the Embroiders Ledger Class that I have been taking I started a page based on the color yellow with only black and white added. I’m really enjoying how this project is turning out. It will definitely have an influence on the body of work I will do. Stay tuned as it progress.

Close up of workbook entry


Flowers

I’ve done the buttonhole wheel cup stitch. I like this stitch I’ve done it before in my Brazilian embroidery work. This time I just scribbled a few round lines and then did a yellow buttonhole wheel cup stitch in the center and a different colored one around the yellow ones. Then I finished off the line with a green buttonhole stitch. I considered doing the detached buttonhole with it also but decided not to since I still have two other stitches to complete in order to catch up.

Now I’m caught up! What a good feeling.

Leaves

The closed base detached needlewoven picot was fun to do. I can see this with a whole field of them. It took a while to do the really long ones but it was worth the effort.
Flags 

The open base detached needlewoven picot stitch first made me think of doing a lizard with the tongue as the stitch. I decided instead to try and make little flags. They came out okay except I would have liked the tips to be more pointed. When I did the first one I wasn’t too sure of how they would turn out but now that I’ve done the whole string of them I rather like them. I do love to weave!

Happy Stitching!
Rose

Thursday, October 25, 2012

A Forced Hiatus

No posting on projects since July. What have I been doing? Well I’ve suffered from eye allergies since moving to Texas. It isn’t the eyes so much as the skin around the eyes. I tolerated it, used allergy medicine, tried cortisone like the doctor suggested and experienced some relief but then it became intolerable and infected. I could only focus on my close up work for brief periods. Finally I went to an eye doctor. She changed my prescription for eye pressure and gave me an antibiotic for clearing up the infection. My eyes became better but the antibiotic blurred my eyesight I could see okay to drive but still couldn’t do close up work. Then finally they were okay, I was back to normal. That is until it flared up again. Then my son requested prayer for me at a healing service and now I’m doing fine.

I did manage to help my daughter and her friend make some banners for a baby shower. That was a fun day and it reminded me how much I enjoy sharing my crafting knowledge with others.

Next it was getting busy for my grandson’s first birthday with a few more banners including a name one. Don’t the lions look cute!


And of course he had to have a birthday outfit. My daughter requested a onsie with a tie and suspenders. I used a pattern from WinterPeach to make it. Then I did a second one. Good thing too since the first one
got extremely dirty from the cake smashing!


Finally I got busy on the TAST 2012 stitches. Seems like I get caught up and then I’m behind by three. Sometimes they are done but I just haven’t photographed them. So here are the latest ones I’ve done. (I’m still behind by three and of course there is a new one this week so I really have four to do.)

Algerian Eye

This was a new stitch for me and a challenge as I wasn’t sure how I wanted to do it. If you’ve been following me you know I’m doing most of them using my continuous line scribble technique. But occasionally a stitch just doesn’t work in that mode. I had a piece of fabric that I had done a design on using the zentangle type concept. Outer borders plus strings were done but that was as far as I had gotten. Maybe I could do the Algerian Eye in those spaces. I did them with a black thread.


Then I tried to continue doing them with color but the black was being lost so I finally did the colors as a satin stitch. Using pearl cotton I did the yellow, blue, and then green. Oh that is color mixing! So I continued with that adding the red and purple. Now I needed a red-violet. It took a while to find the right red-violet color so that delayed the finishing. But I’m happy with the results.


Additional stitches completed:

Cast On

Drizzle
Pekinese
Linked Double Chain
Knotted Buttonhole
Sheaf


Pistil
Now off to try and catch up once again. I’ve enjoyed TAST2012 but I’m not sure if I’ll do all of 2013. It has introduced me to new stitches and gotten me to work with stitches I’ve known but not used very much in my work.
The intent was to expand my portfolio of stitches to use on my crazy quilts but now that project is way behind too! So I’d better get busy. I’ll keep you posted!


Happy Stitching!

Rose

Sunday, July 29, 2012

For the Lefties


This week we were assigned the Oyster stitch. Despite the good instructions on Sharon’s website and the great video on Mary Corbet’s website I couldn’t get the hang of it. I tried all the normal tricks for left handed people like flipping the pictures or turning my laptop upside down but it just wasn’t working. I don’t remember how many times I ripped out my stitches and started again. Finally I took a long hard look at the pictures and started again. I decided that maybe I was going in the wrong direction so I switched the way I was working my scribble. Then I realized my twist wasn’t correct. It was twisted but the starting thread was on top and in looking at the pictures it should have been underneath the second leg of the chain. Of course I wasn’t trying to do single stitches either, I wanted to continue with my scribbles and so I needed to do it as a chain.
I finally got the hang of it and after doing quite a few of them I decided to take pictures of my steps. I’m sharing them here just in case there is another lefthander that is still struggling with this stitch. I really like the way it came out although they aren’t all perfect. But perfect is overrated right? 
Click on any photo to enlarge it for more detail.

Step one: 
Bring the thread to the front of  your work. If you are working a continuous line you only need to do this at the start and when you have to end a thread and start a new one. The only time you anchor the last step with a small stitch is to end a thread or when you have finished the line.

Step two:
Starting the twisted chain
Make the twisted chain. Place the needle a little to the left and down a thread or two from the starting thread. Bring it back up a short distance on your line. This will depend on how long you want the stitch to be.

Wrap the thread over and under the needle

With the thread to the right of the needle wrap the thread over and under the needle. Pull the needle through the fabric. 
Before tightening the stitch

Twisted chain stitch
This should be a twisted chain. Be sure the thread from the beginning of the stitch is underneath.

Step three:
Going under the starting thread
Now bring your needle up to and under the beginning thread. Do not go through the fabric. Check the direction of this stitch, the loop should be on the right of the stitches.


 Step four:

Step four
Next take the needle down into the fabric inside the loop still keeping to the right of the stitches and near the starting point. Bring the needle back out at the bottom of the stitches but not inside the loop.

Thread is now on the left of needle

The thread in the needle should now be on the left of the stitches, you can tighten the loop some but not too much.


Step five:
Loop the thread under the needle and pull the needle through to finish the stitch. If needed give the stitch a little tightening. Be sure not to pull it too tight.
Thread is looped under the needle
Finished stitch!

You are now ready to start the next stitch. If you are doing a line go to step two. If you want a single stitch anchor the last loop with a small stitch.

If this has helped you with this stitch I'd love to hear about it so leave me a comment!

And here's my finished TAST2012 Oyster stitch scribble!

Oyster Stitch Scribble

Happy Stitching!

Rose

Sunday, July 22, 2012

Some Updates


These are continuing and I’m doing my scribbles with them. The last three are:
Bonnet Stitch
Bonnet Stitch
This is an old stitch that is not too well known. I had never heard of it but I managed to do it. I thought I would have a difficult time with it but it actually went quite well.
Up and Down Buttonhole Stitch
 Up and Down Buttonhole Stitch
This was a little more difficult for me to get going on. I had to view a video of someone (Mary Corbet of needlenthread.com) working this stitch with my laptop upside down to get the left hand aspect of it. Worked it awhile before figuring out the best way to hold my hoop and work the stitch. Now I like it. Oh the joys of being left handed!
Basque Stitch
 Basque Stitch
I watched a video (Mary Corbet of needlenthread.com) for this stitch too. It actually went quite well. I left my scribble mark so you could see the way the stitch went around the sharper points. I only had one line not two lines to stitch between.

FLOSS BOBBINS
 In my last organizing post I talked about the plastic bobbins made to wind embroidery floss on. I said I preferred the DMC ones and I still do but I have to report this incident. I needed more floss boxes to store my floss bobbins in. So, I went in search of the larger boxes. I didn’t find any but at one of the craft stores I found the regular boxes at a good price and with 50 free bobbins included. They were being sold under the DMC brand so I thought great and bought a couple of boxes. Was I disappointed – the “free” bobbins were not the same as the nice DMC ones I had previously bought. 


These were in fact far worse than the other brand I had purchased. You can see in the photo (you may need to enlarge it) that they had all kinds of problems even the slots for anchoring the threads were bad. Tsk, tsk, DMC, maybe it would have been better if you had sent them back to the manufacturer as inferior quality rather than offer them to your customers as “free”. Now I’m nervous that they are dumping their high quality products for cheaply made ones. I hope not!!

EMBROIDERY HOOPS WITH SCREWS

New Oval Hoop
Oval Hoop with Plastic Cover
I recently found two new oval hoops. I prefer the oval shape when stitching as my hand can hold it better. These secured the fabric better than my wood ones and all I had to do to protect my threads from the screw is cut a longer piece of the plastic tubing. The only think about this style of hoop is the ridge on the inside ring. I would not leave my fabric in the hoop for very long. (You are should remove the fabric at the end of your stitching session anyway.) But it you stitch for a long period of time I would recommend releasing the fabric every now and again (30 minutes?). Sometimes though I set mine down to do something quick and don’t always get back to it like I had planned. I’ll let you know how it works – I will be damp stretching my work for sure.
Inside hoop

NEW PROJECT

Yes you read right, as if I didn’t have enough going on all ready! But I took another online class, what can I say the price was right! This one was from Big Picture Classes called “Happy Go Lucky Stitchalong “ taught by Amy Powers. We’ve been working on a grid of 25 1 and ½ inch squares using mainly six strands of floss. I’ve never worked that small and I’ve never used that many strands at once. So this was a new experience for me. I’ve only done 5 of my squares. I’ll post more about this project later.

Happy Stitching!

Rose

Saturday, June 30, 2012

Just Another Quick Pop In


Palestrina Stitch Scribble

Just a brief update for the stitching challenge. This week we were given the Palestrina stitch to learn or practice. I’ve never worked this stitch but every time I see it in one of my many embroidery books I think I need to try this stitch. So finally I’ve done it and I like it! This will definitely be going on my go to stitches list. I’m already planning on where to use it next. I didn’t experiment with it too much but will definitely work on different ways of doing it. I do prefer the close stitched ones the best.
Close Up of the Palestrina stitch worked close together

 Now the previous week’s stitch is a different story. After many attempts (at least 4) and then seeking out a video of someone working the Cable Chain stitch I finally got it. But it is not one of my favorite stitches for sure! I have seen some great uses of this stitch from others working the weekly stitches.
Cable Chain Stitch Scribble


Happy stitching!

Rose

Saturday, June 16, 2012

I Love Doing Wheelies!


Buttonhole Wheels

Much to my surprise I found the buttonhole wheel addictive. That’s the stitch assigned to this week’s TAST2012. Maybe I like it because it is round. Round seems to be my favorite shape. I love buttons, fabric yoyos, woven spider web stitch, and dots, just to name a few.

I considered going a different direction for this stitch rather than my usual scribbles but decided to stick with the scribble. I did however scribble in a conscientious way so that I would have round places where I could work the buttonhole wheels. Then I added little individual circles all around my scribble. (And this was even before I knew how enjoyable I would find them!) I like the way it turned out, I used a backstitch to connect my scribble ones and added large French knots to a few of them. I might put a bead in the center of the smaller ones. The thread I used was variegated pearl cotton.


Cretan and Knotted Cretan stitch


The week before was a catch up week but I had already finished working all of the stitches. Before that was the knotted Cretan stitch. Since I didn’t get a post up earlier I’ll show it now. I had trouble getting started with this stitch so I started with a plain Cretan stitch and then worked into a knotted Cretan once I was comfortable with how the basic stitch went.


I’m continuing to work on my butterfly vest. The outer edges of all of the butterflies have been finished as well as their bodies. I’m in the process of adding the antennae.

Batik block
For the quilt guild I belong to the challenge for June was to use four different batiks and made a railroad block. I found some batiks in my stash and then added two more before deciding which ones to use. I wasn’t sure I liked the combination until I actually put the block together. This is how it turned out. Now I wish I had enough to make a full quilt!


Lion and Lamb embroidery


My blocks for the crazy quilt challenge are coming along- slowly. The lion and the lamb for the March block are done.

I know, I know the lion should be roaring but my grandson (8 months old) loves to look at his Tutu’s work and I didn’t want to scare him! Haha!


Finally went ahead and made the blocks for April, May and June. Now to get them all stitched and embellished.

April block
May block
June   block
Happy Stitching,
Rose