Showing posts with label Stitch Meditations. Show all posts

Sunday, January 10, 2021

And Then Winter

Stitch Meditation on Trees

 As I sit and look out my window,

Or stroll on my almost daily walk

Tall trees stand

Exposed, bare

No fancy dress of greens, pinks, oranges or reds

Just skin and bones

Skeletons really

Waiting.

Waiting for spring to come.

Waiting for a new day.

A day when the sun will again warm the earth.

Waiting for a new dawn.

When new growth will begin to stir

Nourished.

Exploding into riotous color.

Providing shade, shelter, food.

To a world that’s been waiting.

Resting.

Preparing for a new day.


Happy needle pulling thread!

Rose

Wednesday, December 16, 2020

Back to Stitch Meditations

 Stitch Meditations have always brought me pleasure and a sense of grounding. I suppose it’s partly because I started hand stitching at an early age. I can get lost in stitching and hours go by so fast. I stopped doing the little daily stitches this year and have missed them. I still get on Facebook and see what others are doing but I’ve made very few myself this year.

Recently I made one and discovered how sorely I had missed doing them daily. So, I’m trying to get back to a daily habit.

I stumbled upon some silver metallic looking fabric the other day and bought some to try on a woven wreath I was wanting to make. It came out great and so I made my way back to the store and bought some more of the fabric. If you are into fabrics you know if there is a fabric that speaks to you, you had better buy if while it’s available. Otherwise, when you go back to get more it’s gone!


Woven Silver Wreath

Since I had this fabric I was thinking of other ways to use it. What about the background for a Christmas card? That would look good. But what theme to put on it. My mind wandered to a fabric artist that I am intrigued by who makes wonderful art pieces with just scraps of fabric. I remembered she had made some poinsettias. Maybe I could do something like that. I snipped some pieces of green and red fabrics and arranged them to resemble the poinsettia. Then I stitched them down. I decided to add a yellow button for the center using red thread in sort of a star pattern.

Poinsettia from fabric snippets

Then I thought I’d try a more detailed one by cutting the leaves and brackets out rather than just snipping little pieces of fabric. I cut out a leaf freehanded. I like it so that became my pattern for the leaves. For the red bracts I just cut pieces out from three different types of red fabric and laid them down. After using a little bit of glue to hold them in place I stitched them to the background fabric. For the center I decided to do French Knots in red, yellow, and white.

Poinsettia with French Knots

Happy with those two I thought what if I do a more minimal, modern, abstract one. Now minimal is difficult for me. My favorite art instructor was always suggesting I remove some element from my work. Guess her suggestion has stuck with me as I try sometimes successfully, sometimes not so successful.

For the centers I had been wanting to use a shiny yellow button I had but it was a shank type button and would not lay flat on the piece. I knew if I placed it in the opening of a fabric yoyo that would make it look a little better. I wanted to make a yoyo for the center of this one. I know maybe not so modern after all. For the yoyo I wanted a fabric that would resemble the center red, yellow, and white, I remembered I had some aloha fabric that was red, yellow, and white. I knew I had quite a bit of it but where was it in my stash. I looked in several places unsuccessfully. Frustrated I prayed “Lord help me find that fabric. I just need a little bit of it.” Then I remembered I had used some of it to make some flags to use as decorations for a party for my Hawaiian husband. I knew right where some leftover flags were stashed. And yes there were some from that fabric. I made my yoyo and put the button in the middle.

Modern Abstract Poinsettia

Happy with the outcome of all three. And I’m thinking of a fourth one from round circles.

Who knows maybe I’ll have a full quilt of little poinsettias for Christmas next year.

Or maybe they will just grace Christmas cards.


Happy needle pulling thread!

Rose


Tuesday, October 13, 2020

Stitching Circles and Other Things

Buttons, yo-yos (the fabric kind), circles, rings, ovals, and round are a few of the things and shapes that I love. Needle pulling thread is a process that I can get lost in for hours!

I follow a few online groups that focus on taking small pieces of fabric and bits of threads and practice slow stitching or stitch meditation. One group focuses on stitching circles on their pieces, often adding a button or some other object in the center of their stitching. I love all the work shown and decided to use this technique on one of the patches in “Nine Patches, Five Threads Red”. I wanted to keep the button in the center. I could have sewed the button on first, but it would then be in the way of the stitching thread. So I gave it some thought, considered marking around the button, but I didn’t want to deal with making the mark disappear.
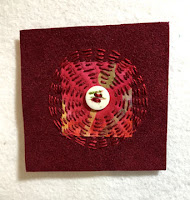
Small Patch with Circular Stitching

Then I remembered I had some round stickers about the size of the button. I placed the sticker on my patch where I wanted the button to be and stitched around it. Once I was done stitching I removed the sticker and sewed the button on. That was a good, easy solution.

Recently someone on the group asked how people get their circles so seemingly perfect. I almost responded with my sticker idea but then decided to write a little blog post instead.

Expanding on the sticker idea I purchased some larger size round stickers. You could print different size circles on a full page label, but then you would have to cut them out. Or if you are fortunate to own or have access to a cutter machine that can cut multiple circles you could probably use that. I don’t have this option, so I settled for what I had.

The stickers I bought were labeled “permanent”, so I was a little nervous about using them. The good news is the fabric has enough lint (small fibers) that the labels don’t stick permanently as soon as they are applied. If you are using a specialty fabric such as a smooth satin or silkie that may differ you could place the sticker on a fabric that is linty just to pick up some surface tension and then place it on the fabric you want to stitch.

I would caution about leaving the stickers on for a long time especially if they will be stored in a way that pressure is applied to the sticker.

Here are a few samples of using stickers as guides for stitching.

Stitching around some circle labels 

You could also cut out shapes – leaves, flowers, vines, etc. to use as a guide for stitching. Rectangular labels work great as guides also.

Leaves, button flower,  and a moon

Now about perfect stitches. I don’t aspire to making perfect even stitches on my art pieces. I like the look of a natural organic stitch. Outside of practice, practice, practice if I for some reason want perfect circles and stitches I would probably resort to an embroidery machine.

Happy sewing in circles!

Rose

Wednesday, November 13, 2019

Small Communities


A while back I had the idea to put together some small kits for fabric collage work. 
The stARTer Collage Kit

I finally got around to doing this and used a few to test out my instructions with a small group of friends. They were my "alpha testers". They enjoyed the process and we had a pleasant afternoon working on them. My directions were not finished but we did our best. Here's a photo of the results. 
The work of the first testers

One member enjoyed it so much that she has continued the process at home. Here's a photo of her work.
Donna Atkins addition work

This Thursday I spent an evening with one of my small communities. Our main emphasis is art. We do a variety of handwork and machine work from painting to weaving, knitting to crocheting, embroidery to quilting, etc. You get the picture – that’s why our group name is EtCetera. So for this session I had agreed to do little stitch meditations using my art collage kits. I had plenty for them to choose from and each kit contained 4-5 small pieces of fabric along with 3-5 colors of perle cotton thread, a felt backing and some needles. A rough draft of my instructions was also included.
The hope was they would be my beta testers and give me some useful feedback on the kits. That hope was definitely realized.
Collages from the EtCetera Group

Even though I was exhausted from working late the night before and from early in the morning preparing the kits I left with a feeling of satisfaction and well-being. Was that from the success of the kits? No.
It was from a sense of community. As the group of about 15 ladies sat around the table working out their designs and stitches, they carried on with conversations about life. Not politics, not religion, just life in general. One person shared a bit of joy that had happened in her life, we thought about our “leader” who was unable to attend due to her husband recently having surgery. But mostly the conversation dwelt around animals, both wild and domestic and their antics and interactions with each other and with humans.
It was a very enjoyable and relaxing evening. I think we, as humans living in a very busy, sometimes disjointed age, need to have more of these small community gatherings where we just work with our hands and engage in chit-chat.
More collages from the EtCetera Group
I meet with a number of small groups loosely formed around the bigger world of quilting however it wasn’t until this meeting that I used the words “small community” to describe these gatherings. That to me is what we are – small communities doing life together.
One of the participants said “the group wound up chatting like magpies, telling stories, and laughing while we stitched. I really didn’t want to leave”.
More collages from the EtCetera Group

The youngest member of the group came up to me at our guild meeting to show me her finished piece although she said it wasn’t finished she wanted to put a backing and binding on it to turn it into a coaster. Her mom said she had already taken over her piece to “fix” it for her and that the daughter was planning on doing even more to use as practice pieces to improve her stitching. I was thrilled because that is my strongest wish to encourage and give young people the thrill of hand stitching.


Keep on stitching and sharing!
Rose

Monday, July 8, 2019

Winging It Creatively


This goes out to all my friends who sometimes (or maybe always) wing it when working on a creative piece. I’m not one of those people who plan everything out in detail before starting. I tend to dive in and go for it. Of course I do have a habit of thinking and thinking and thinking about something before I actually start doing it but once I start anything can happen.


I’ve been working on a couple of small art quilts using my Stitch Meditations. The meditations were started with no thought of how they might be used, they were just quick (well maybe not so quick) stitching using scraps of fabric and threads. As they progressed though they started presenting themselves as something more and I just had to go with it. Even to the point of not doing stitch meditations on a daily basis. I will get back to that though because I really enjoy it and they seem to spark more ideas.

So I just started seeing how I could put some of these little pieces together. For one I knew I wanted a “white-whitish” background using strips of different white and white-on-white fabrics in varying widths. I wanted to quilt the background using straight – well sort of straight – lines. I originally thought I would do lines very close together but when I just did lines ¼ to ½ inches apart I decided that was the look I had in mind. See less is more as one of my art teachers always told me. I had a tendency to throw everything but the “kitchen sink” into my work. So she always encouraged me to remove something. Nowadays I’m trying to use that principle more and more.

Okay the background is done, now to attach the stitch meditations. Once I had arranged them the way I wanted I noticed the ones in the four corners had a little curve to them and if I arranged them just right it gave a hint of a circle to the piece.

After looking at it on my design wall for some time I thought I wanted to add some stitching on the background to add to the circle effect. After talking with some friends and getting their opinions (some saw what I was getting at, others had other ideas I could try) I went with my original idea and finally dove in and started stitching.
I wasn’t too pleased with the way it was looking but since I had put in the beginning stitches I had to commit to them (I was afraid if I pulled them out I would have big pukas (holes in Hawaiian) that would be difficult to hide. The thread I was using was DMC Pearl cotton size 8 and the needle was fairly thick.
After I started and did the bottom section and part of one side I put it up on the design wall. I liked it but the stitching was a little wonkier than I wanted. I wanted a very organic circle not a perfect circle.
Light bulb moment: I really should have put it up on the wall and then determined where my stitching would be placed. It would have been easier to see where the line should be rather than looking at it flat on the table. I could have used a string or tracing paper to get it placed better. With the tracing paper I penciled in the lines on the paper and then made a few marks for guides and then cut out the tracing paper.


Now it was time to mark the background. Remember the background is white. I did not want my markings to show. I did not want to use an erasure or water to remove the marks. Then I remembered my Hera tool. That will make a small crease in the fabric that will stay there until I have finished stitching. Perfect.


I’m done stitching and I’m not sure it had the effect I was hoping for but it’s done.
Next time I think I would test it out on a small sample first. And of course I have the tips for marking now that I can use at the beginning of the project rather than in the middle!

I’m thinking I may like it better if I added another circle inside the circle and another one inside that. But for now it’s done.

I can always come back and add more circles if I want to because:

Less is more but sometimes, just sometimes, more is better!

Enjoy stitching!
Rose

Wednesday, April 3, 2019

Then This Happened


So this happened. 
At the beginning of 2019 I was going through my writings/notes and journalings for the past years and I recognized a theme. I procrastinate a lot and as a consequence I don’t do well at starting and finishing projects/ideas/tasks. I have a lot of ideas, projects, and tasks and I spend a lot of time thinking- just sitting and thinking about them. Even this post has been on my mind since the start of the new year.
I realize once I do get started it either gets finished or gets advanced to a point where I need to consider my next step. I rarely have a beginning to end plan and when I do things tend to change along the way. However that puts me back into the sitting and thinking about it mode. Which is okay, except when I’ve come up with the next step I tend to just keep thinking about it rather than start doing it.

Then this happened.

I went into Facebook and Facebook popped up a memory for me:
    
On 1/18/2011 I wrote a note “So instead of sitting and thinking of what to do I’m gonna adopt Nike’s slogan and get up and “Just Do It”!”

Wow that was in 2011! Guess I didn’t do what I said that time.

Then this happened.

A few weeks later I was on my way to church and thinking about my starting/finishing situation. I pulled up at a stoplight. The car in front of me had a bumper sticker that said “Just Do It”. Yup that’s right. Another prompt.

Then this happened.

A few weeks later I was leafing through some old magazines and the Summer 2009 Art Quilting Studio magazine had this The Last Page article “Go Do” by Cynthia Shaffer:
Photo of magazine article

One line she wrote struck me “Go Do is also followed by “you can’t finish until you start”. Uh-huh another prompt.

So I am attempting to encourage myself to get up and get started.
Towards the end of 2018 I was trying to get myself out of a somewhat depressed/overwhelmed state that had stalled my creative self. I came across a group on Facebook called Stitch Meditations. I wrote about it here. It helped me recoup a lot. So I was determined to do one a day for 365 days – a whole year. I fell behind a few days but did 2+ a day to catch up. But then I reached #64 and stopped – well not completely. I was still creating working on a small wall hanging quilt. I just wasn’t doing a completed daily Stitch Meditation.
Then my daughter started encouraging me to join in the 100day project. I had done a similar challenge back in 2015 to do some art every day. I made it to day 51. So I’m thinking 50-60 days is about my limit.
I went to Instagram to look at one post my daughter thought I would like.

And then this happened.

I started scrolling through the #100dayproject and sure enough another prompt. Andrea Scher posted her first day one:
Instagram photo by Andrea Scher

So I’ve decided to join in. I plan to do some form of random slow stitching every day for 100 days. It may be on a Stitch Meditation, or a small collage or an art quilt, or even an original embroidery design or scribble. It may only take an hour to finish or it may take several days.
But every day I will pick up needle and thread and slow stitch something.
My day one entry:
Photo of my day one 100dayproject

Just start!

Rose

Sunday, February 24, 2019

Sunday Thoughts - Blue, Red, Yellow

Stitch Meditations Done in Blue, Red, and Yellow


I am still working on my Stitch Meditations. I occasionally get behind but then I catch up only to get behind again.
I worked a series of red and white for valentines and then worked a series of white, cream, and beige. Then I went back to color.
I did an all blue one. Then I decided to do an all yellow one. Since those are primary colors I decided to do another red one. And then the thought came to me: isn’t it amazing that God took just three colors and from them created all the other colors we so enjoy today. That just blew my mind. And then I thought wow – Blue for heaven where God’s throne is, Red for His blood that was shed for our redemption, and Yellow for His Spirit, the light of the world. And really that’s all the color we need.
That’s my Sunday thought for this week.
Enjoy living in such a colorful world!

Rose


Friday, February 1, 2019

I did it! 30 Daily Stitch Meditations!

The first 30 Stitch Meditations for 2019

Here’s a look at all of them. I’m going to explore with you some of hat them in more depth as we go along. Some I like more than others; some have taught me valuable lessons about myself and my style. But the first ones I’m going to cover are these.
Recently a friend was giving away strips of fabric she wanted to get rid of. They had been decorated by students at a workshop she taught. I took 3 of her strips but had no idea why.
Then I started researching an idea I had to see if anyone else was doing it. Well you know what happens online in places like google; Pinterest; Flickr and the likes. Rabbit holes are all over the place! I stumbled on this technique and realized that was what was going on with those fabric strips.
About the same time I came across the Stitch Meditation group on Facebook. I joined in and started creating little mini fabric collages which became a perfect place to use pieces of the strips. I’ve indicated where the strip was used on each piece.
First up are the “whole cloth” ones, only stitches were added to these and sometimes some buttons and lace. 
One took on the appearance of a fan.
Fan shape with lace trim
Another one had faces looking out at me. 
Faces one side view one straight on

One spoke to me of a summer cloudburst. 
Summer cloudburst over the hills

And then there was just stitches wandering around buttons and space.
Stitches and buttons wandering around

Placed with other fabric they blended in sometimes just a square in the middle,
Square in the middle
sometimes most of the middle,
Most of the middle section
or on the left side.
On the left side
One even joined with a piece of felt leftover from a stitching project my 4 year old granddaughter and I made.
A piece of felt and lots of stitching

Now back to the rabbit hole:
The process is simply using pre-washed fabric, rubbing alcohol and Sharpie pens. You can do it flat or place the fabric over a jar or some type of container and then use rubber bands to hold the fabric in place.
You color the fabric with two or three markers and then spritz it with a little rubbing alcohol or use an eye dropper to drop the rubbing alcohol onto the colored area. Then be patient and watch the magic happen. The color will start to spread. You can add more rubbing alcohol if desired or wait for the fabric to dry (takes just minutes) and then add more color and/or rubbing alcohol.
Some Sharpies will not work; like the ones made for fabric or the fast drying ones.
This process requires experimentation, patience, and imagination. The fabric should be heat set with an iron for 5 minutes (keep moving the iron to keep from scorching the fabric and use a press cloth), or it can be placed in a dryer.
It is best to use this fabric where it will not require washing.


Enjoy!
Rose

Friday, January 11, 2019

Finish It Friday Is Back!


Well technically Finish It Friday is to be something I finish on Friday. This kinda is since it is Stitch Meditations for Week One 2019-
I'm actually planning on posting these every seven days so I am a little late with the first seven for 2019.
So here they are:
One
Fabric samples from long ago plus some old variegated threads


Two
Background fabric hand marbled by my son 30 years ago, dk pink scrap left after cutting out petal for an applique rose design. Looked like a footprint to me!

Three
Scraps of fabric and a couple of buttons.

Four
Background fabric was cut from a piece of Sharpie/rubbing alcohol treated fabric gifted to me. My son mentioned a fan I had when he was a kid and this piece turned into a fan with a little stitching and some lace.

Five
Scraps of random fabric stitched together, some more of the Sharpie/rubbing alcohol fabric plus two commercial fabrics. This is one of my most favorite works so far. So much so that I scooped up what little fabric I had of these and stored them away for a future small art quilt I want to make.

Six
Just some scraps of fabric, a yoyo someone else made and a button tied together with some sweet light pink thread.

Seven
Scraps of fabric and two buttons. Love the slightly bohemian look of this one.


Enjoy!
Rose